12. Didžejanje s programom Mixxx
Mixxx je bil ustvarjen za enostavno učenje tako za novince, kot tudi izkušene didžeje.
Ta del priročnika podaja smernice za uporabo funkcionalnosti programa Mixxx pri ustvarjanju lastnih miksov.
12.1. Pravilno nastavljanje nivojev (določitev ojačitev)

Pravilna nastavitev nivojev, ki je poznana tudi kot Gain Staging, je bistvena za zagotavljanje najboljše kakovosti zvoka opreme, ki jo uporabljate. V vsaki povezavi v vaši verigi signala, od Mixxx ojačitev kanala pa do ojačevalca, morajo biti nivoji krepko preko praga šuma, a še vedno pod maksimalnim nivojem, preko katerega začne signal prebijati. Merilci nivojev bi morali iti večinoma do vrhnjega dela zelenega področja. Merilec nivoja prikazan na levi strani prikazuje, kje bi morali biti merilci v povprečju ob na najbolj glasnih delih skladb. Povprečni nivo naj ne bi bil v rumenem delu. Rumeni del uporabite, da dopustite prostor na vrhu, ki omogoča da bolj glasni deli ne prebijajo. Najbolj glasni deli (vrhovi) naj za kratek čas uidejo v rumen del.

Valovna oblika z dobrimi nivoji. Bodite pozorni na to, da so primeri valovnih oblik v tem razdelku bili ustvarjeni s prilagajanjem prikaza ojačitve v prikazovalniku valovne oblike, da bi bolje prikazali koncept dela. Prilagajnje prikaza ojačitve sicer ne vpliva na nivo signala zvoka.

Če je merilec signala v rdečem področju, signal prebija in je potrebno znižati ojačitev. Nekatere naprave nimajo merilca nivojev, temveč le LED lućko, ki zasveti, ko signal prebija. Prebijanje pomeni, da se vrhovi valovne oblike stisnejo ali porežejo, ker je naprava dosegla največjo stopnjo ojačitve signala, ki jo zmore. To popači zvok na neprijeten način in lahko opremo poškoduje, saj jo poganjamo z več moči, kot jo lahko prenese. Jačanje signala preko točke, kjer se začne prebijanje (še bolj v rdečo), bo še bolj opačilo zvok. Če želite narediti zvok bolj glasen po tem, ko so vsi členi v verigi signala na maksimumu, uporabite več zvočnikov ali bolj občutljive zvočnike, ki bolj učinkovito pretvarjajo elektirčno energijo v akustično.

Prebijanje valovne oblike

Po drugi strani signal ne sme biti prenizek. Razlog temu je dejstvo, da vsaka zvočna naprava ustvarja tudi nekaj šuma, ki mu pravimo prag šuma. Poleg tega analogni signali pobirajo šum, ko potujejo po žicah. Signal, ki ga je izmeril merilnik na levi, je precej blizu pragu šuma. Vendar - vsakič ko ojačimo signal iz predhodne naprave v verigi signala, se ojačita tako signal, kot tudi šum. Na primer, če je vaša zvočna karta utišana in ojačite signal na mešalni mizi, da bi ga dvignili, je razmerje med signalom in šumom zvočne (SNR) kartice majhno in bo miksre ojačal tako signal, kot tudi šum, vključno s šumom, ki ga povzroči žica. Končni rezultat bo imel več šuma, kot bi ga imel, če bi dvignili izhod zvočne kartice in signala ne bi bilo potrebno ojačiti na mešalni mizi.

Valovna oblika, ki je preblizu pragu šuma
12.2. Izenačevanje ritma in miksanje
Beatmatching is the process of adjusting the playback rate of a track so that it matches the tempo of another track. Beatmatching also involves adjusting the phase of the beats in a track so that they are aligned with the beats in the other track. Matching the tempo and aligning the beats are the two things a DJ must do to beatmatch.
Mixxx lahko izenači tempo in poravna ritem namesto vas, a za to potrebuje za obe skladbi natačno prepoznan BPM in pravilni ritmični mreži za. Ta funkcija se vključi z gumbom SYNC. Za ročno izenačevanje ritma je potrebno tempo obeh skladb sinhronizirati z uporabo drsnika hitrosti. Fazo ritma lahko prilaogdite tako da desno kliknete in vlečete po poljubnem prikazovalniku valovne oblike in tako začasno pospešite ali upočasnite eno od skladb, dokler obe nista poravnani. Za trenutno prilagajanje hitrosti so na voljo tudi gumbi za začasno pregibanje višine, ki omogočajo “prerazporejanje” dob naoprej ali nazaj, tako da jih izenačimo z drugo skladbo. Glej poglavje Kontrole za sinhronizacijo in določanje hitrosti.
Dve skladbi sta ritmično izenačeni, kadar iamta enak tempo in so dobe poravnane. “Perfektno” izenačen ritem je skorajda nemogoče doseči, ker bodo vedno obstajale majhne razlike v hitrosti predvajanja. Vešč didžej bo imel našpičena ušesa in bo poslušal, kdaj se ritma začneta razhajati. V tem primeru se pojavi značilni zvok “dvojnega bas bobna”, pred katerim se pogosto pojavi manjašanje jakosti basa, ki je posledica faznega zamika. Ko se to zgodi, se lahko ritma poravnata z nekaj pritiski na gumb za pregibanje višine.
12.3. Sync Lock
Sync Lock is an intelligent assistant that allows you to leave the beatmatching to Mixxx so you can focus on track selection, effects manipulation, looping, 4 deck mixing, and other advanced DJing techniques.
To activate Sync Lock on a deck, push and hold (or click and hold) the SYNC button. You’ll know Sync Lock is on because the sync button will remain lit. Changing the rate of any deck that has Sync lit will change the rates of all other decks that also have the Sync button lit. There is no need to set specific decks to be a leader or followers. You can play, stop, eject, load, and queue any track with sync lock and it won’t interrupt the playback of the other decks. However, changing the rate of a stopped deck will change the rate of playing decks.
Sync Lock will also notice if one of your tracks is double the BPM of another track and match them correctly. So if you want to mix a 140 BPM drum & bass track with a 70 bpm dubstep track, Sync Lock will make sure they are lined up properly.
Nasvet
Usually, Sync Lock will only make sure the rate sliders are set correctly. If you also want to make sure your beats are perfectly in sync, turn on the QUANTIZE button. When activated, Quantize will ensure that the beats are perfectly lined up as well.
12.4. Sync Lock with Dynamic Tempo
If you’re working with dynamic tempo tracks that have a variable BPM beat grid, you have precise control over the sync lock behavior via the following Sync Leader buttons (available in the LateNight and Deere skins only).
 Follower
  Soft Leader
You can create a variable BPM beat grids for single tracks by using the Analyze library context menu and Reanalyze (variable BPM) command. Alternatively you may create variable BPM beat grids for all tracks to be (re)analyzed later on by unchecking Assume constant tempo in the Beat Detection preferences.
When such a track is playing in a Leader deck, the follower decks closely follow the tempo. It’s important to note that the track follows the „detected“ leader tempo unconditionally, even if there are sections with unstable tempos during bridges or in the outro regions where the actual played tempo wasn’t detected correctly.
If a soft leader deck stops or is silenced, Mixxx automatically selects the next best deck as Leader. By clicking the Leader button, you can choose between Soft Leader and Follower mode. A Soft Leader is not sticky, and will automatically move if the current leader becomes invalid.
By default the „Sync Lock with Dynamic Tempo“ feature is enabled and Mixxx picks the first Sync Lock enabled track as Soft Leader, using the tempo from its outro during the following transition. If you’d like to use the the tempo from the intro of the next track instead, click the Leader (Crown) button of its deck. The deck then becomes the soft leader, and Mixxx will use that deck’s tempo instead.
The only case when a stopped deck can be a Leader is if no other deck is playing. Once a deck starts playing, Mixxx will pick that as the leader instead. If another deck starts playing, then you will be able to pick which one you want to be the leader again.
If you’d prefer a steady tempo during transitions like in Mixxx before Version 2.4, you may select Use steady Tempo for Sync mode in the Decks preferences. In this mode all decks become a follower during a transition and you may pick a dynamic track as a leader by clicking the Leader (Crown) button if desired.
A leader plays always the original recorded tempo changes. A follower changes its tempo matching the leader which may result in a notable pitch change. Engaging keylock helps mitigate this pitch issue.
12.5. Harmonično miksanje
Harmonic mixing is a technique to mix songs with matching melodies and harmonies. To learn more about harmonic mixing you might want to check out the mixshare archive.
Mixxx has two features to help you with harmonic mixing. The first is a key lock. When it is active changing the speed of a track won’t affect the key. To enable key lock, click the key lock button in the Mreža gumbov z opcijami predvajalnika. The second is that Mixxx can automatically detect the key of a track and will display it in the library and the decks. The notation which is used to display a key can be changed in Key Detection Preferences.
12.6. Snemanje miksa
With the integrated recording feature you can record your mix as an audio file and listen to it later, distribute it as a Podcast or burn it to CD.
By default, Mixxx records the main output. Alternatively, Mixxx can record the output of an external mixer if you have an audio interface configured for the Record/Broadcast input in . Refer to Recording And Broadcasting With An External Hardware Mixer for details.
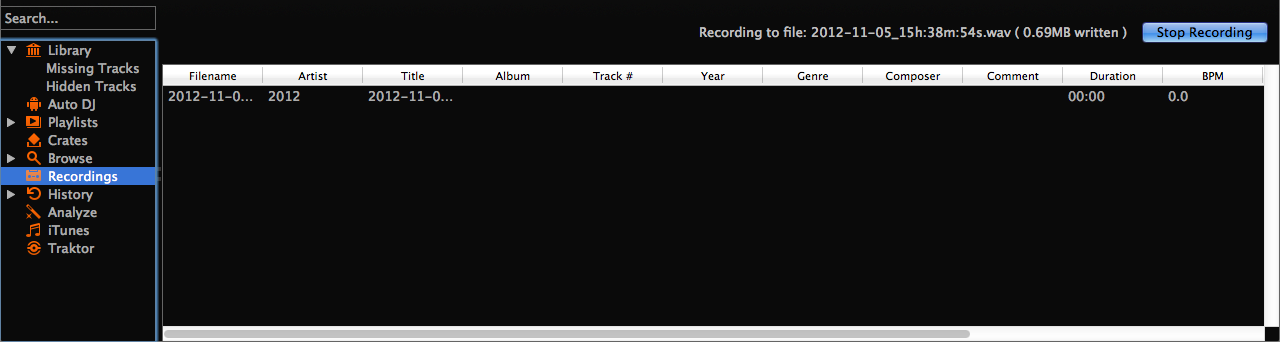
Mixxx zbirka - Ogled posnetkov
Mixxx can record your mix in various audio formats and quality settings. You can
split your recordings, generate cue files, choose a custom
recording directory and even set your own metadata. By default, Mixxx
saves your recordings as lossless WAV files to a
Mixxx/Recordings sub-folder in the Mixxx music directory. Before you
start recording, we recommend that you adjust the settings in
.
Če kliknete na ikono „Posnetki“ na stranskem panoju v Mixxx zbirki, pano na desni prikaže vsebino našega direktorija s posnetki. Novi posnetki se bodo shranili v ta direktorij, kot tudi CUE datoteke, če jih potrdite v možnostih.
Nasvet
Snemanje miksov za kasnejše kritično poslušanje je odlično orodje za izboljšanje lastnih didižejevskih tehnik. V pomoč je tudi, če svoje mikse pošljete drugim didžejem, da vam podajo mnenje.
Posnemite svoj miks na disk
Click on the recording icon on top of the application window to start, and stop the recording session. The duration of the running recording is displayed next to the icon.
Opomba
The recording widget might not be available in some skins.
Alternatively:
Kliknite na ikono „Posnetki“ v stranskem panoju, da bi preklopili v pogled Posnetki.
Kliknite na gumb Začni snemati`ali kliknite na :menuselection:`Možnosti –> Snemaj miks V meniju na vrhu okna programa Mixxx.
The display above the track table shows how much data has already been recorded, as well as the duration of the recording.
Izvedite svoj miks
Kliknite na gumb Ustvai snemanje, da zaustavite snemanje, ko je miksanje končano.
Nasvet
You can instantly play your recording as a track in Mixxx. Simply drag-and-drop the track to a deck.
12.7. Intro and Outro Cues
Intro/Outro cues are used to mix in and out of tracks and they can also be used with Auto DJ to mix in and out at those points. Unlike hotcues, they do not mark only one point. The into and outro are sections and each section is defined by two points.
Mixxx detects where the first and last sounds are when analyzing a track making it easy to stop playing silent parts at the beginning and at the end of the track. The analyzer places the intro start point at the first sound and the outro end point at the last sound. The first and last sounds are determined by the first time the signal rises above -60 dBFS and the last time it goes below -60 dBFS.
Intro start and outro end cues placed at the first and last sound of a track respectively by the analyzer
You can decide where to place the intro end and the outro start points. Marking the whole intro and outro allows Mixxx to calculate how long each section is and show it on the overview waveform. This information can help you know when to press play on the next track. Auto DJ can also use this information to line up tracks and determine how long to crossfade.
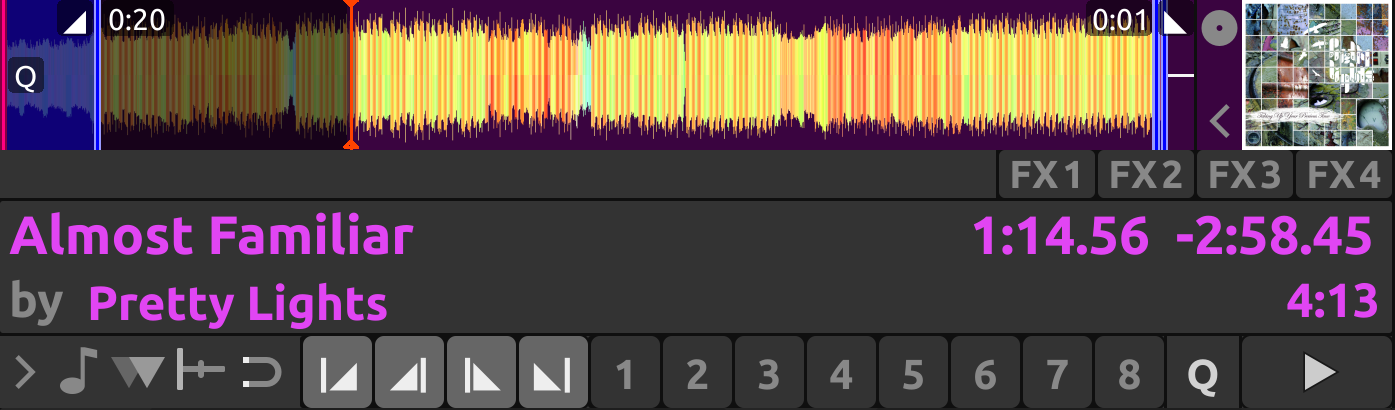
Intro end and outro start markers placed on the track alongside the intro start and the outro end markers to make sections
Mixing With Intro & Outro Cues
You can line up the ends of the intro and outro so the energy of the new song picks up right as the old track ends.

Intro and outro end markers aligned showing on the waveform
If the intro and outro are short enough to fit on the waveform at the same time, you can simply watch the waveforms and press play when the markers align. Otherwise, you can watch the time remaining on the deck and hover your mouse cursor over the outro end line on the overview waveform. Mixxx will show you how much time is left until that point. When that time equals the length of the intro, press play to precisely line up the end of the intro. If you have changed the tempo of the track, the time remaining scales to show the real time remaining at the adjusted tempo.

Alternatively, you can line up the start of the intro & outro. In this case, watch the scrolling waveform when the outro start point is coming up on the old track. Then, press play on the new track when the old track reaches the outro start.
Opomba
There are no rules on which method should be used. The method you decide to use is an artistic judgement based on the musical content of each track, what the vibe of the crowd is at that moment, and what you want to do with the mix.
If you do not have the intro end and outro start points marked when loading a track, you can find and mark these in headphones before you mix in the track. Then seek back to the intro start to get the track ready. If you don’t have time to find the outro end point before mixing in the track, you can use the deck cloning feature to drag and drop to a new deck, then seek ahead on the new deck and listen in headphones to mark the outro start point. If you don’t have time to do that either, you can right click on the overview waveform where you think the outro starts. Then look for how far that is from the end of the track to compare it to the length of the intro of the next track.

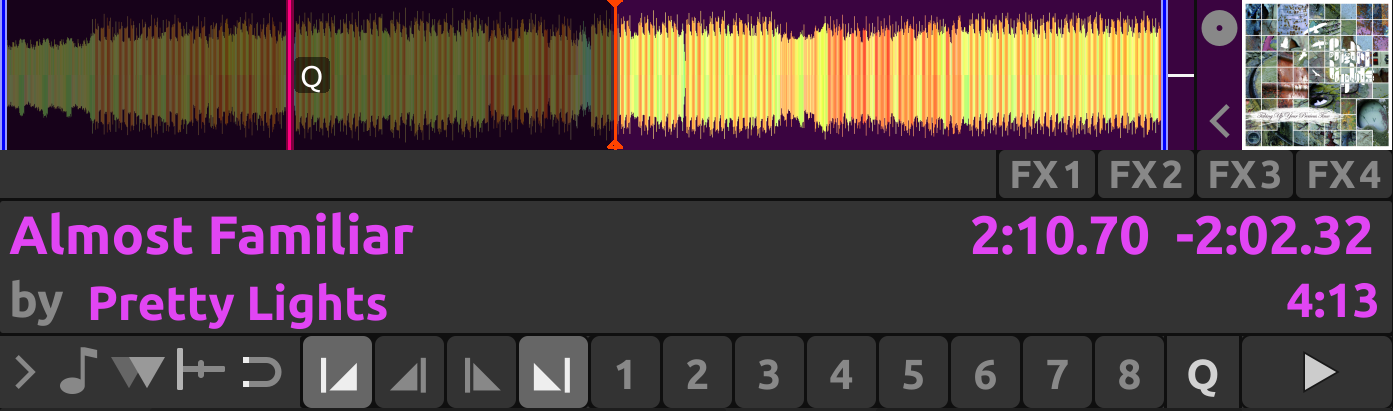
Here the outro is approximately 30 seconds long. However, the analyzer placed the outro end point before the end of the track, so the outro is actually a little bit shorter than 30 seconds. Without marking the outro start point, you would have to do some math in your head to find exactly how long the outro is.
12.8. Auto DJ
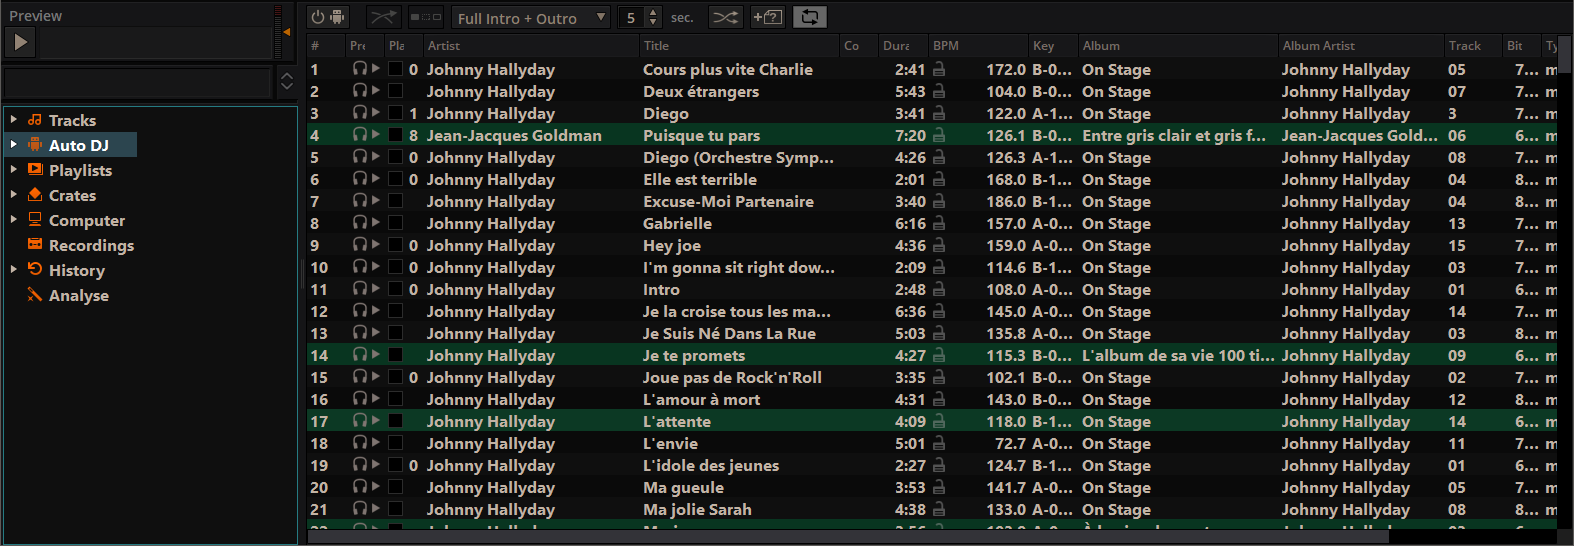
Mixxx zbirka - Samodejni DJ pogled
Auto DJ automatically loads tracks in the decks and mixes them. Tracks can be manually added to the Auto DJ playlist, or automatically from assigned source crates or from the entire library.
Auto DJ does not take into account the volume of each track, nor the frequency content, nor the rhythms, so it’s not intended to be a replacement for a human DJ. However, it is good enough to give a human DJ a break without a major disruption to the mix.
For mixing, Auto DJ takes control of the crossfader. Auto DJ requires at least one deck to be assigned to the left and right side of the crossfader. This can be done with the deck orientation switches next to the crossfader. If a deck’s orientation is centered, the crossfader can’t affect it. Note that in the official Tango skin, these switches are in the decks‘ transport controls row, and in Shade skin they don’t exist because decks are statically assigned to the left and right side (bus).
When Auto DJ is toggled on, it will use the first two opposing decks it finds. With default settings these would be decks 1 and 2, but depending on how the orientation switches are set, this could be any configuration, for example deck 4 on the left and deck 1 on the right. If no opposing decks are found Auto DJ won’t start.
Opomba
Note that Auto DJ is currently not aware which decks are currently visible, i.e. it might pick currently hidden decks 3 and/or 4. Refer to the skin settings for how to toggle 4 decks.
When you toggle Auto DJ off, the crossfader will stay on its last position.
Each official Mixxx skin has an Auto DJ indicator icon, located either in the top toolbar or in the mixer. In some skins the crossfader is highlighted, too.
Nalaganje skladb v Auto DJ
Za samodejno predvajanje skladb, morajo biti te najprej naložene v Auto DH seznam predvajanja. Privzeto je ta seznam prazen.
Mixxx zbirka - Dodajanje seznama predvajanja v Samodejni DJ
Obstaja več načinov za nalaganje skladb v Auto Dj seznam predvajanja.
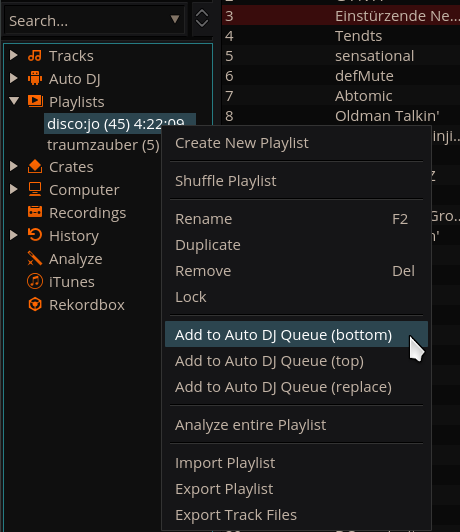
Izberite eno ali več skladb iz zbirke, seznama predvajanja ali zaboja in ga povlecite na ikono Samodejni DJ na levi strani.
Izberite običajen seznam predvajanja ali zaboj, desno kliknite nanji in iz miškinega menija izberite Dodaj v Auto DJ. To bo dodalo skladbo v Auto DJ zaporedje.
Medtem, ko ste v Samodejni DJ prikazu zbirke, povlecite skladbe iz zunanjega upravljalnika datotek na ikono Samodejni DJ v stranskem panoju ali na Samodejni Dj seznam skladb na desni.
Automatically adding tracks from crates
Instead of inserting the contents of the crates directly into the Auto DJ playlist, Auto DJ crates are associated crates that become a source of random track selections.
Add a crate to the Auto DJ track sources: Expand the Auto DJ item in the sidebar, and right-click on the Crates sub-item. Select one of the existing crates from the list. This makes the content of the crate available for random selection into the Auto DJ queue for automatic mixing. The name of the crate is now listed as sub-item below.
If you do not have any crates available for selection in the list, go and create a crate first and add some tracks, see Crates - Organizing tracks into collections.
Manually add tracks from track sources to Auto DJ: Click the Auto DJ item in the sidebar and switch to the Auto DJ view of the library. Click the Add random button to add one track at the time from Auto DJ track sources to the bottom of the Auto DJ playlist.
Opomba
If you did not set any crates as an Auto DJ track source, clicking the Add Random button will add a randomly selected track from the whole library instead.
Automatically add tracks from track sources to Auto DJ: Mixxx can randomly add tracks to the Auto DJ playlist from track sources as soon as a specified minimum number of tracks remain. Select . Set to change the minimum number of tracks after which random tracks may be added.
Opomba
If you did not set any crates as an Auto DJ track source, tracks are selected from the whole library instead.
Remove a crate from the Auto DJ track sources: Expand the Auto DJ item in the sidebar, and right-click on one of the crates listed below the Crates sub-item. Select Remove Crate as Track Source to remove the crate from the Auto DJ track sources.
Predvajanje skladb z Auto DJ
Sedaj, ko ste naložili skladbe v Auto DJ seznam predvajanja, lahko aktivirate Auto DJ na tak način:
Kliknite na ikono ‚Samodejni DJ ‚ v stranskem panoju, da preklopite na Samodejni DJ prikaz zbirke.
Kliknite na gumb Vklopi Auto DJ.
Prva skladba iz vašega seznama se bo naložila v predvajalnik in predvajanje se bo začelo.
Mixxx bo samodejno miksla skladbe, dokler AutoDJ seznam predvajanja ne bo prazen.
Kliknite na gumb Izklopi Auto DJ, da zaustavite samodejno miksanje skladb
Nasvet
You can add a track to the end of the Auto DJ playlist once it is played instead of removing it. Set .
Auto DJ Mix Modes
Auto DJ has several modes it can use to mix tracks:
Full Intro + Outro
Fade At Outro Start
Full Track
Skip Silence
The Full Intro + Outro and Fade At Outro Start modes both use the intro and outro cues but the Full Track and Skip Silence cues do not.
Full Intro + Outro and Fade At Outro Start
The Full Intro + Outro and Fade At Outro start Auto DJ modes use the intro & outro cues to determine how long to crossfade and how to align the tracks in time. In both modes, Auto DJ compares the duration of the outro of the old track and the intro of the new track. Auto DJ picks the time of the shorter section as the crossfade time.
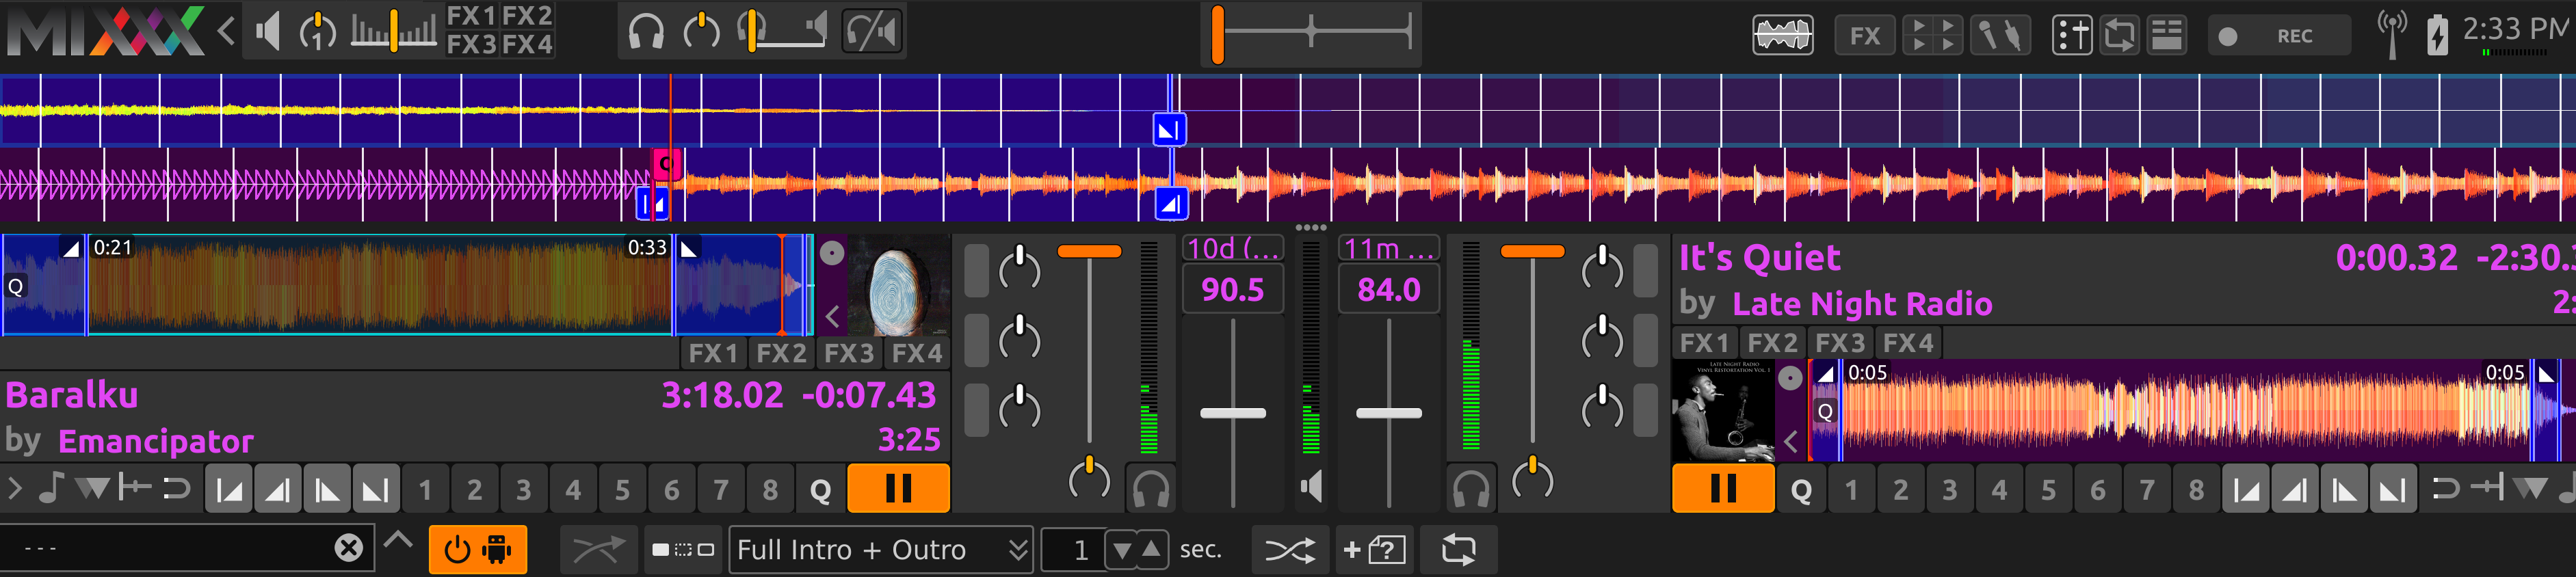
In both modes, if the outro is shorter than the intro, Auto DJ will align the start of the outro with the start of the intro.
Intro and outro start markers aligned by Auto DJ
The two modes work differently when the outro is longer than the intro.
- Full Intro + Outro Mode
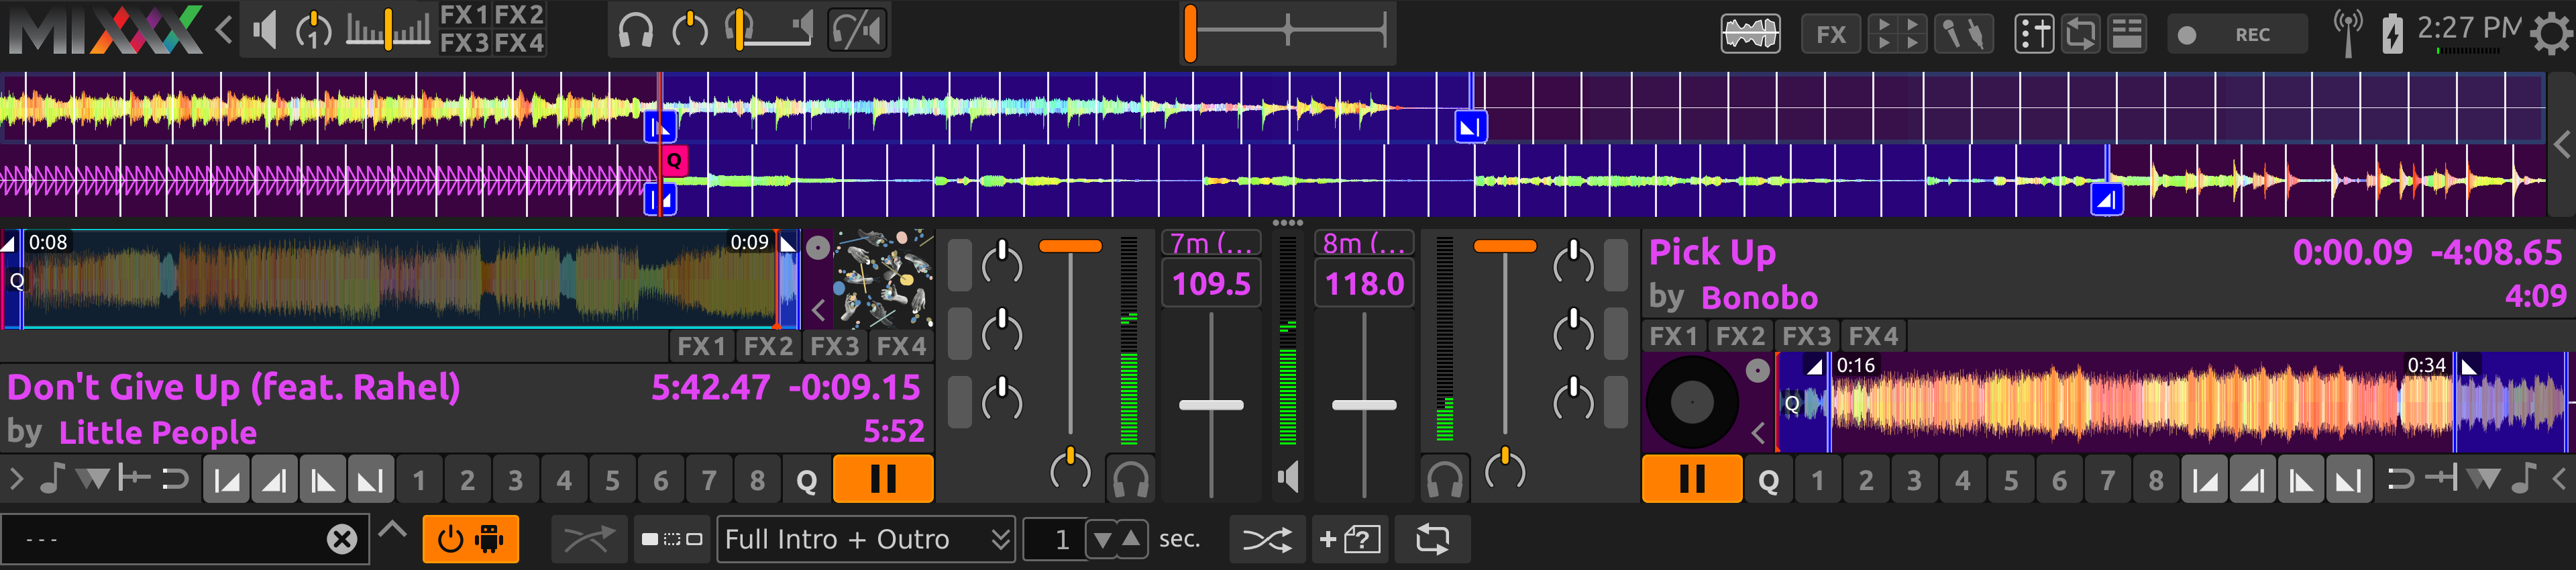
The full length of both the intro and the outro are always played. When the outro is longer than the intro, Auto DJ aligns the end of the intro and outro by starting the next track during the outro of the previous track. This mode is the most likely to sound good with the widest variety of tracks. Therefore, it is the default mode.
Intro and outro start cues aligned by Auto DJ in Full Intro + Outro mode
- Fade At Outro Start
Auto DJ always aligns the start of the intro and outro. When the outro is longer than the intro, Auto DJ cuts off the end of the outro. This can be helpful if you want to prevent the energy of the mix from declining during a long outro. However, the transition may sound abrupt if the intro is short.
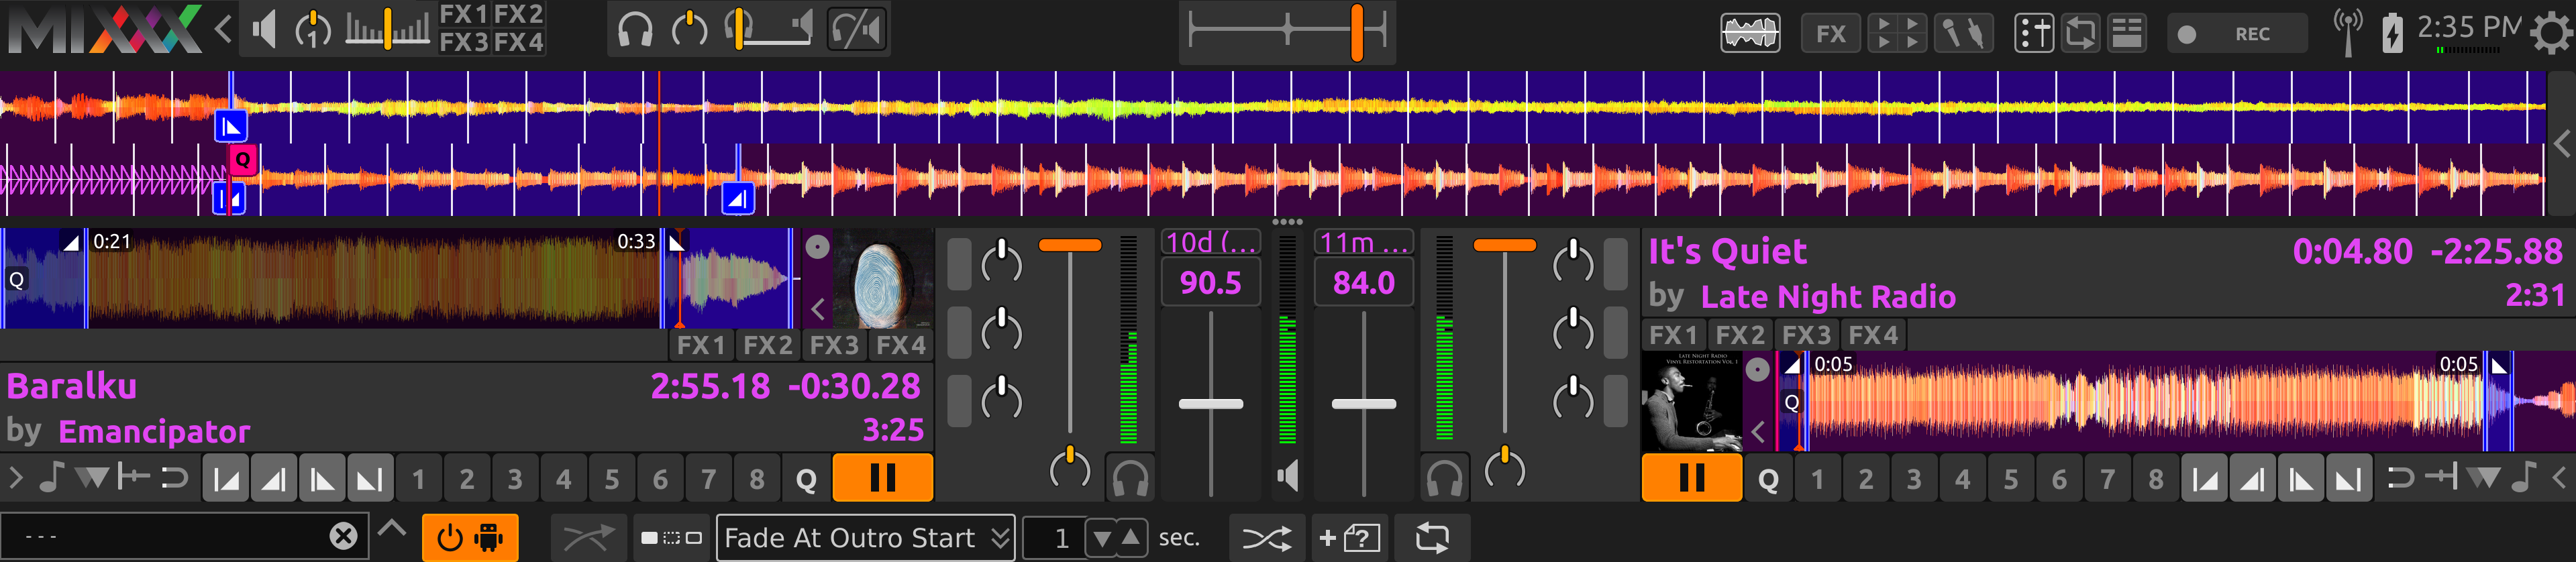
Intro and outro start cues aligned by Auto DJ in Fade At Outro mode
Full Track and Skip Silence
The Full Track and Skip Silence Auto DJ modes do not use the intro and outro cues. They crossfade tracks over a number of seconds that you specify in the box next to the mode selection menu. The Full Track mode plays the entire length of every file. The Skip Silence mode works the same way but automatically cuts out silence at the beginning and ends of tracks (defined as when the signal first goes above or below -60 dBFS).
Nasvet
If you still want to use Auto DJ like a normal music player application, use one of these modes with a transition time of 0 seconds.